Working on Winnie
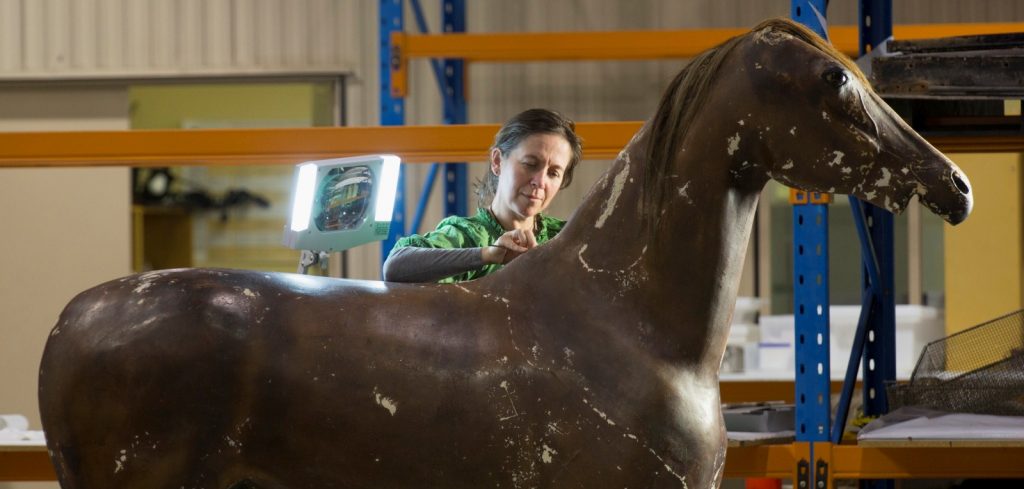
Chloe Bussenschutt works as an objects conservator at the National Museum of Australia. One of her recent tasks has been the stabilisation and revitalisation of a horse mannequin from a saddlery business in Cooma, a town on the high, windswept Monaro plains of southern New South Wales. The mannequin features in Spirited: Australia’s Horse Story, the Museum’s latest exhibition. In her writings below, Chloe reveals the artful, philosophical and technical dimensions of this particular conservation project, and her personal fascination in the object now called Winnie.
In March 2014 I began working on a saddlery horse mannequin that has been affectionately named ‘Winnie-the-Pooh’ by one of our registrars, supposedly because he whinnies at one end and poos at the other. Winnie dates from the 1880s and was manufactured in the USA.
‘Winnie’ is a life size model of a chestnut gelding. The fabrication method appears to be a timber and wire armature, which has been modelled in plaster and coated with a sealing and adhesive compound. The final exterior layer is painted canvas effectively making him a large three-dimensional painting. Glass eyes, a horsehair mane, removable cast iron ears and a removable hide/hair tail finish the model creating a beautiful mannequin, although a little odd looking when minus his removable body parts.
The wide range of materials, coupled with his wear and deterioration, made for a challenging and exciting conservation project. The aim in treating Winnie was to stabilise him, to try to prevent further deterioration and revitalise his significance as an example of an early saddlery mannequin. Winnie’s former life as a saddlery mannequin was standing sentinel outside the entrance to Quail’s saddlery, a long established business in Cooma in southern New South Wales. He was acquired by the National Museum in 1986 and has to my knowledge sat on a high shelf in one of our storage facilities ever since.
When Winnie was acquired he was in what we call ‘barn’ condition, and twenty years of storage hadn’t improved him. The damage to his condition included significant losses to his paint layer due to age, wear and vandalism, long continuous cracks in the surface due to movement at the joins of his base armature, loss of a significant amount of his mane, damage to the hair and hide components due to insect activity, and loss or separation of removable components due to failing fastenings or compromised attachment points. Further to this, Winnie had a number of prior repairs including infills of a number of cracks that had opened up around armature joins and a significant canvas repair on his neck.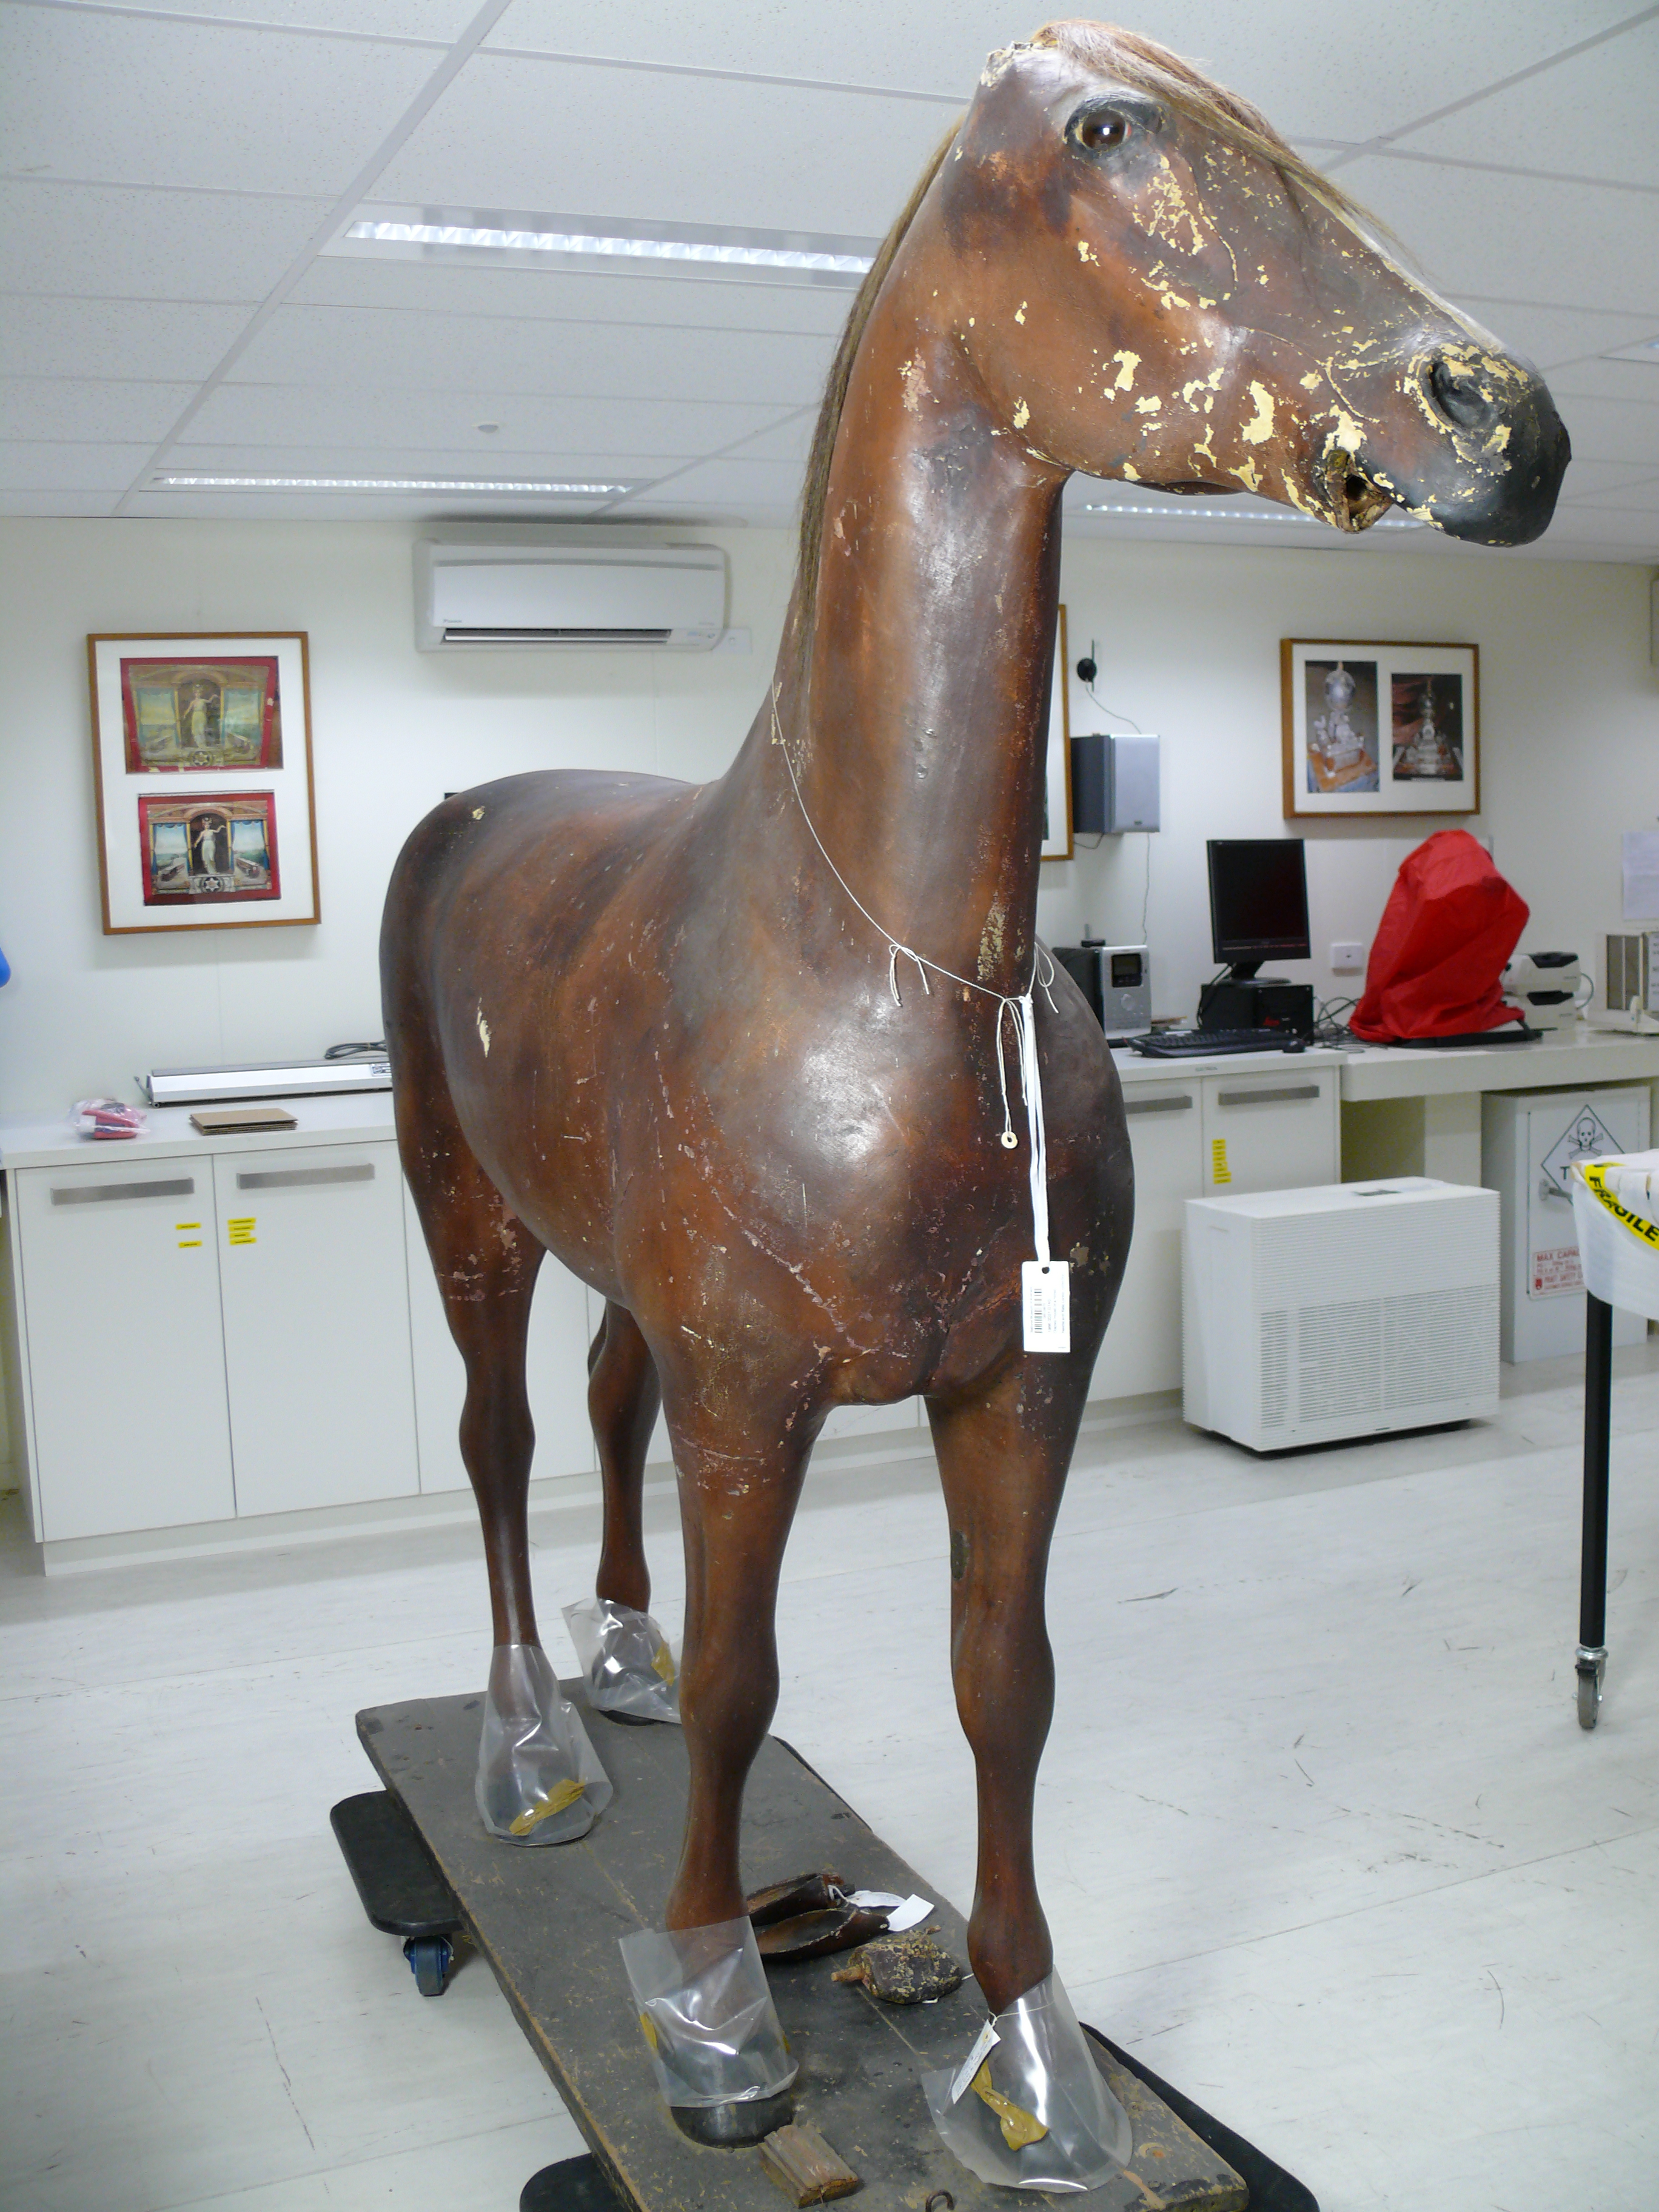
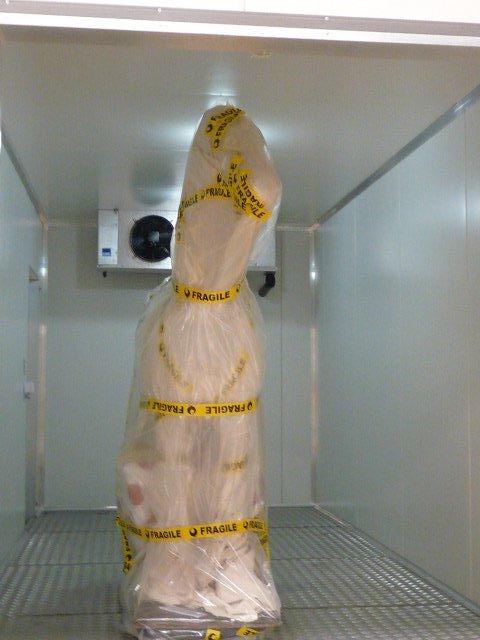
I began to acquaint myself with Winnie by documenting his condition and by taking detailed photographs of his wear and deterioration. During the process of documentation, it became apparent that he had sustained significant insect damage through his horsehair mane and tail and although this now appeared to be inactive, Museum policy is to take precautionary measures and so Winnie was put into our large, walk-in freezer. He was wrapped from head to toe in calico and polyethylene plastic to prevent condensation touching the surface then frozen for a week to ensure an end to the insect activity.
In conservation at the National Museum, we do try to consider different treatment options as there is rarely only one way to approach a treatment. In this case, long-term stability had to be weighed against exhibition deadlines. For this reason, I wrote a treatment proposal that provided three possible treatment pathways along the spectrum of stabilisation and repair. The proposal also formed the basis of my discussions with curatorial staff, whose vision and understanding of the significance of objects is essential for conservation work.
At one stage, the planned positioning of the mannequin within the exhibition was also considered when discussing potential treatment parameters. That is, given the time constraints, should we treat only what is visible to the audience, or treat one side more fully than another, with a view to completing his treatment in the future? However, as with many exhibitions, design layout can be a dynamic process and it was apparent that his placement may be changed in the lead up to the exhibition and that an overall treatment was necessary. Given the lengthy list of objects for the Spirited exhibition, time was of the essence. My treatment process needed to efficiently and effectively stabilise the object and visually ‘soften’ the deterioration.
After his week in the freezer, Winnie’s treatment began. The first stage was similar to that of many objects: brush vacuum using a soft brush and micro vacuum. This process gently removes dust and loose particulates, and is another step in the process of understanding an object’s condition more intimately. Winnie’s surface was peppered in spots of insect frass (droppings), ingrained dirt and unspecified accretions. I used a wooden pick to remove raised areas of frass, and a dirt eraser to remove ingrained dirt and finer ‘films’ of unspecified materials. Enzymes were then rolled across these areas with a cotton swab. This proved successful over most of the accreted material.
It is standard practice in conservation to test materials that you are thinking of using to ensure they will not adversely affect the object you are working on. This is especially important when using solvents, including water. Solvents are found in a range of conservation processes including cleaning, the removal of adhesives and coatings, and in the preparation of consolidants (binding agents), adhesives and paints. In preparation for the treatment, I carried out tests with a range of consolidants, modelling compounds, pigments and paints to determine the most appropriate and compatible materials and methods for Winnie’s treatment. The solvent tests revealed that many of our base solvents, as well as warm water, could remove the original paint layer to different degrees.
Armed with my tests, I knew in advance that a number of the processes in Winnie’s treatment were going to fiddly and time consuming. Using cues from the team that had recently finished worked on the paint consolidation of other large objects for the exhibition, I decided to re-adhere the loose canvas and trace the edges of the holes in the paint layer with a heat activated conservation grade adhesive. Once heat activated, this product wicks into the underside of the canvas or paint layer and prevents further losses from occurring. This method was successful over most of the body of the horse, however the paint layer in Winnie’s flank and chest area had shattered to such an extent that moving a heated spatula over these areas was not an option. Instead, another conservation grade adhesive was diluted and wicked under the shattered paint with a fine brush.
The filling of the paint losses with modelling compound was the most labour intensive process in the treatment, taking approximately 45 hours. The tests that I had carried out earlier lead to me choosing a water based compound that formed a good bond to the canvas beneath, dried quickly but maintained good workability over time, could be built-up to at least 5 mm depth without cracking, didn’t alter the colour of an applied or blended pigment or paint layer, and was re-soluble should removal be necessary at a later date.


Originally, I had sought to tone the modelling compound with pigment and then apply this as a base layer. However, Winnie’s chestnut colouring is not singular, and contains a great deal of variation across the surface. This variation was complicated by fading due to UV exposure and damage on one side. Instead, I opted to fill the paint losses with a white modelling paste that I would then tone later. With so many losses to this surface coating, once these white fills were completed, Winnie appeared much like a starry constellation!


Painting the white modelling paste fills followed. I used diluted acrylic paints, matched to the area I was working on, and carefully applied them with a fine brush to cover only the modelling compound. As part of the staged treatment process, it was decided to do colour washes, and then where necessary return to further ‘soften’ the fill by applying more colour or using a pointillist method which works by visually ‘breaking up’ the block colours of painted fills. This approach proved successful and Winnie’s coat was soon complete.
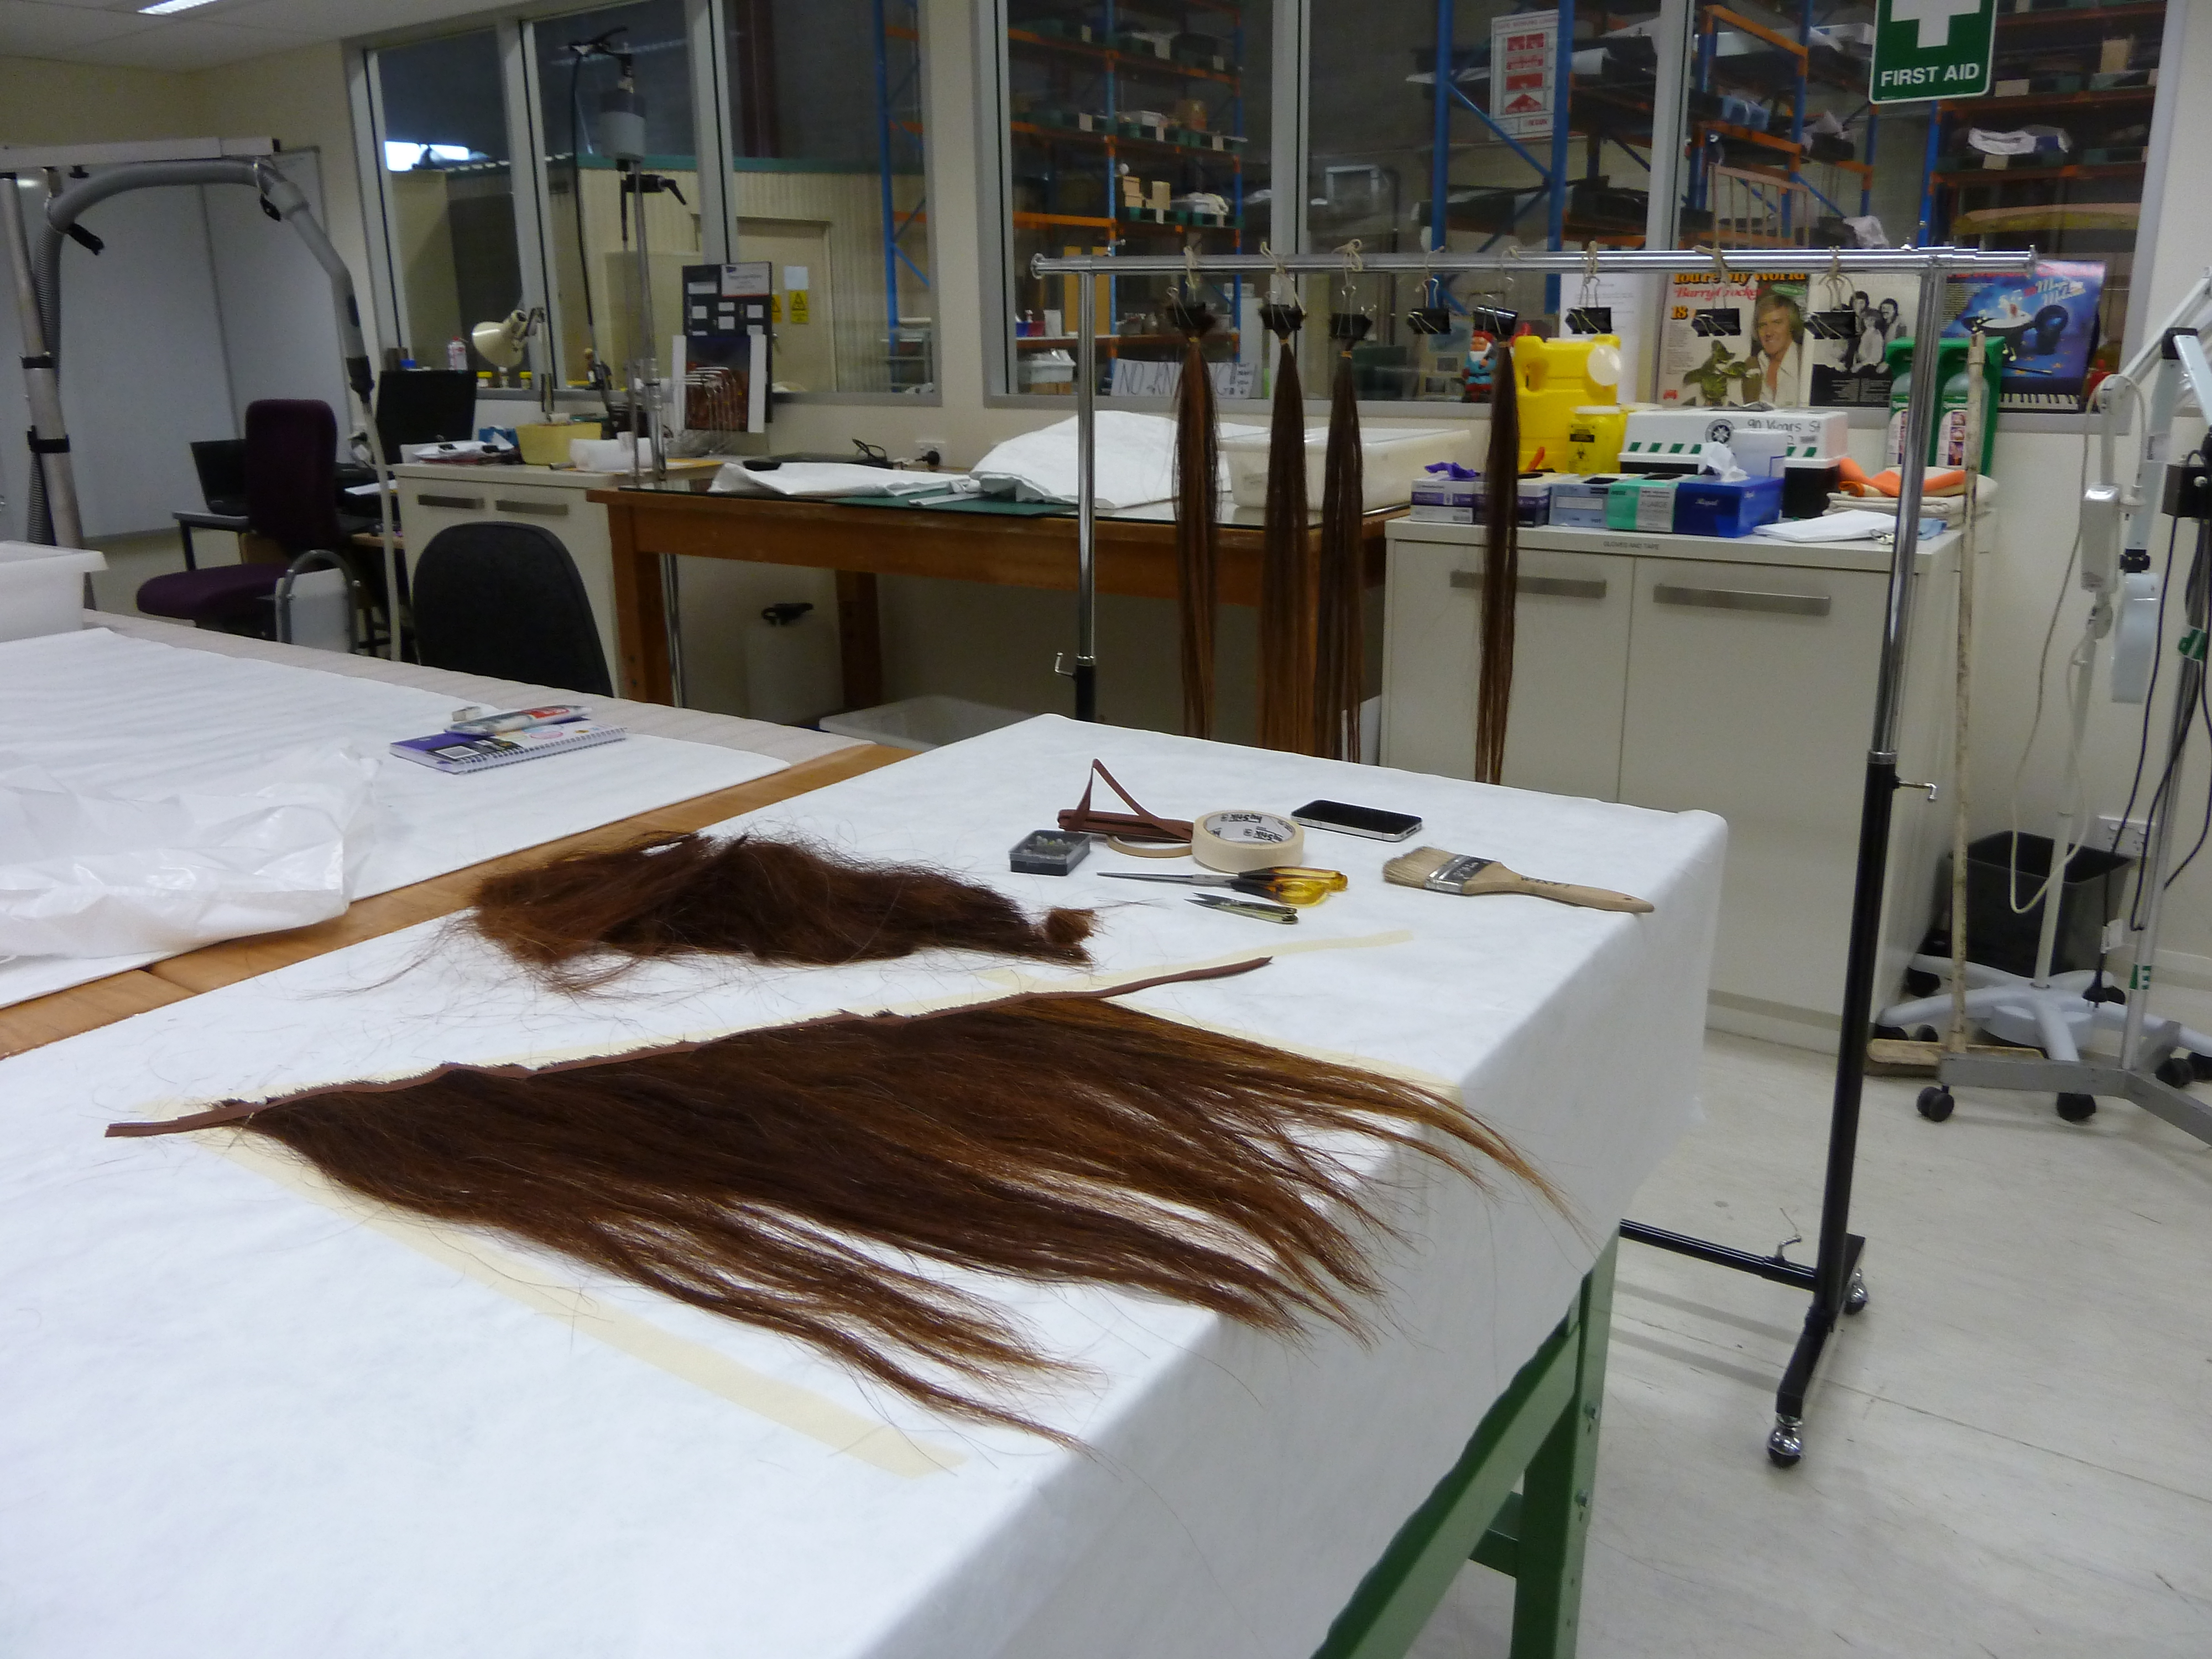
Once I had completed the treatment of Winnie’s body, I began addressing the removable or separated components. His muzzle and cast iron ears had been removed due to their instability or loss of fastening pins. First, I secured his ears into position by creating leather sleeves to shrink the internal diameter of the holes that the ears were to be inserted into. A split in the tail’s large wooden ‘pin’ was repaired and the tail simply reattached, as the fit was secure. His mane required a little more creativity as only a few hanks of the original horsehair mane remained. After a discussion with curators, I decided to make a horsehair wig. I knew of an abattoir in Victoria that supplied tails to the rocking horse industry and ordered two horsehair tails. Again, in accordance with Museum policy of incoming organic materials, these were placed into the freezer program on their arrival as a precautionary measure. After the tails came out of the freezer, they were washed with a conservation grade surfactant to remove dirt, particulates, plant material and insect casings, separated into more workable bunches, and dried. I drew up a pattern for the section that needed replacing, prepared a fabric seam and laid the hair out. The cut ends were turned and sewn into a fabric seam with the wispier ends providing a naturalistic look to the mane. This wig was fastened to Winnie’s neck ridge with small upholstery tacks, using the existing tack holes from the original mane. His forelock, which had been shorn by carpet beetle at the hide roots was held in place with very fine silk thread.
Finally, a mild steel pin was cold-forged, replacing the lost pin and holding his lower muzzle in place using the original mechanism on the upper muzzle to attach it. With this final body part in place the conservation of Winnie was complete and he was fit for installation into the exhibition.
Initially, the curatorial vision was to fit Winnie with tack, as his original purpose would have been to display tack-for-sale outside Quail’s saddlery. However, after several attempts at fitting a range of selected tack, it became clear that tack was not a suitable fit and that the fragile surface coatings may be damaged in the process. So, Winnie is displayed unharnessed.
Working on Winnie was a pleasure. Approximately 100 treatment hours were taken in total and I confess to a few late nights were I found myself talking to Winnie and wondering when I would fill the last visible gap in his surface coating. It was the kind of project that I really enjoy, as it draws on my conservation knowledge and skill and requires me to use my artistic skills. As with many treatments, it is interesting to return to the before-and after-treatment photos and be reminded of the journey.
I think that Winnie’s new appearance would stop and seduce Cooma shoppers once again. It is interesting to reflect on the power of objects, how invested we become when working on them, and how in the case of soulful creatures like Winnie it is possible to personalise them (it must be those big brown eyes).
Are there objects that you give names to and feel considerable personal connection to?
